
Understand the network configuration page
If the device is connected to a network, you can print a network configuration page to
view the network settings for the device. You can use the network configuration page
Understand the network configuration page
125
to help troubleshoot network connectivity problems. If you need to call HP, it is often
useful to print this page before calling.
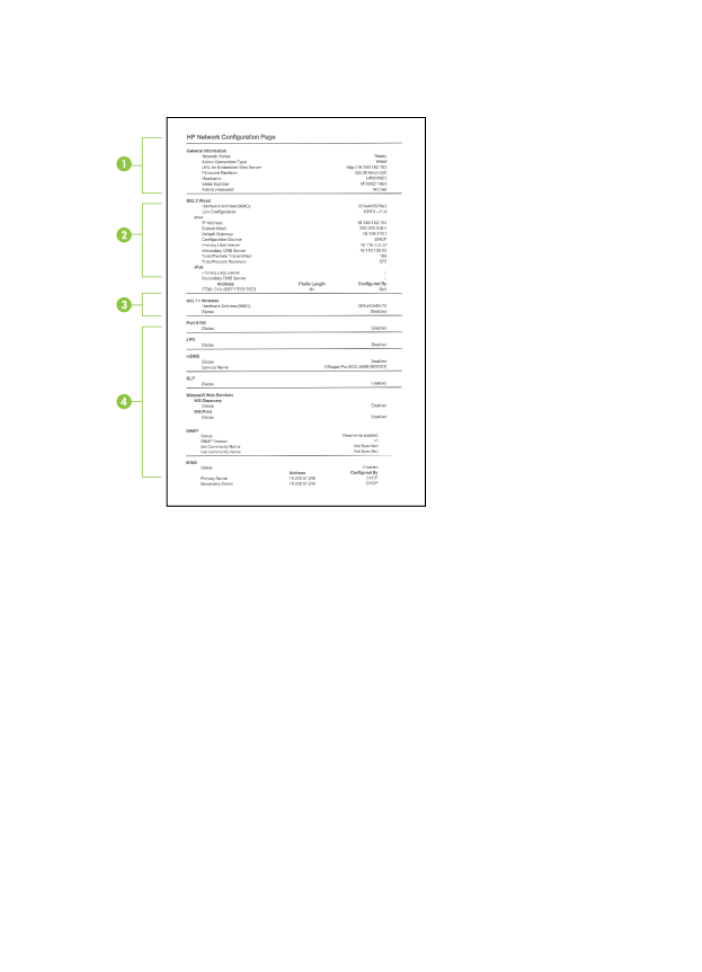
Network Configuration Page
1. General Information: Shows information about the current status and active
connection type of the network, and other information, such as the URL of the
embedded Web server.
2. 802.3 Wired: Shows information about the active wired network connection, such
as the IP address, subnet mask, default gateway, as well as the hardware address
of the device.
3. 802.11 Wireless: Shows information about the active wireless network connection,
such as the IP address, the communication mode, the network name,
authentication type, and signal strength.
4. Miscellaneous: Shows information such as the total unicast broadcast packets
transmitted and received, and the administrator details.
•
mDNS: Shows information about the active Multicast Domain Name System
(mDNS) connection. mDNS services are typically used on small networks for
IP address and name resolution (through UDP port 5353) where a
conventional DNS server is not used.
•
SLP: Shows information about the current Service Location Protocol (SLP)
connection. SLP is used by network management applications for device
management. The device supports SNMPv1 protocol on IP networks.
Chapter 10
126
Configure and manage

To print the network configuration page from the control panel
•
If the device has a two-line display: PressSetup, select Network Setup, select
Print Network Settings, and then press OK.
•
If the device has a color display: Press the Setup button, select Network, select
View Network Settings, select Print Network Configuration Page, and then
press OK.